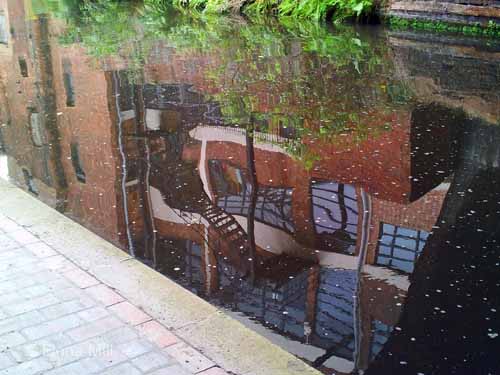
Out in Birmingham, sketching and taking photographs along the canals in the city centre, I begin to see the urban topography differently. My younger rock-climbing head is still with me. I map routes in my head up the vertical faces of rocks and buildings. The multi-coloured concrete and glass blocks create deep canyons, balconies and architectural features overhanging older well-trodden walkways and the still canal below. The undercrofts of the new apartment buildings mirror the footprints of the 18th and 19th century wharves and workshops resulting in dark watery cul de sacs protected by metal grills and gates, graffitti here and there, where no hand or boat can possibly reach. But the diverted light reflects off the glass into the water; and the water in turn reflects the prismatic light back onto the buildings. Depths in the surfaces. Dizzying.
1) A miserable rainy day, but drawn to the reflections, I stop to make a few notes in my sketchbook and take a photo. I realise that I have an idea for a print.
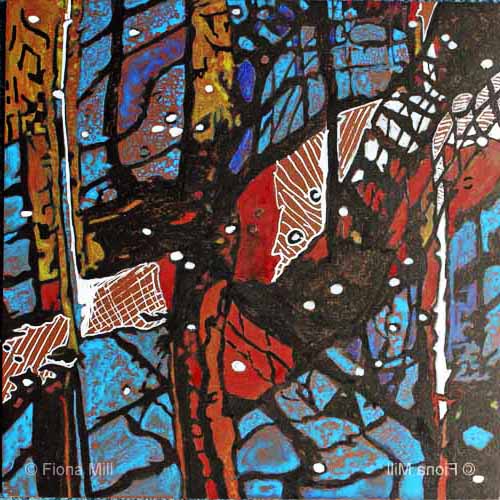
2) When I get back I sort through the information I’ve gathered but influenced by the smells, the dampness and the grey day , I decide to work on another print entirely in monochrome.
But the reflections stay with me. A few weeks later I take some lino and draw and paint the image directly onto the block using a pentel brush pen and watercolour. I remember just in time to reverse the image so that it will print true to the orientation of the actual building. This is the first of a series of flips and reversals that tax my brain and patience until something clicks and I finally work out how to simplify and manage all the lines and shapes.
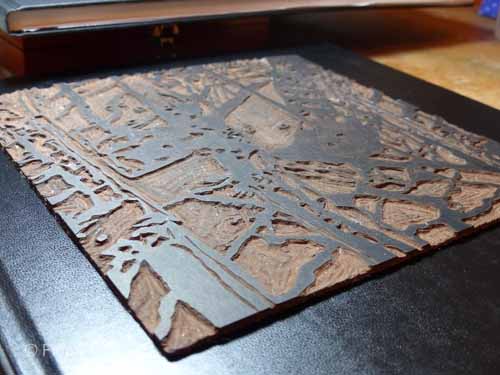
3) I nearly always paint the key image onto the block before carving, but don’t always paint in the colours. For this image though I needed first of all to review the positive and negative shapes and then create a map towards the final result. This photo of the painted block anchors me through the process. It also complicates my initial idea of the colours resulting in a classic printmaker’s muddle all of my own making.
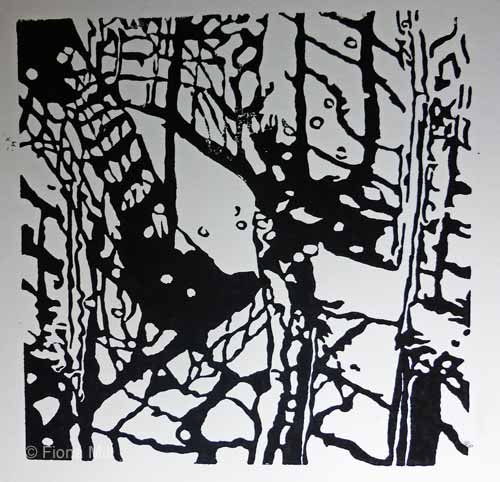
4) I cut away everything on the lino apart from the black.
5) Using water-based printing inks, I take a print of the block and then adjust the carving and repeat until I’m sure I’ve got what I want. I’m happy with the overall composition and the strength of the image.
6) I then turn to carving the colour blocks. I need 5 colours; red, sepia, yellow and two shades of blue. I work out how to do this by layering three primary colours. I’ll have to factor in a lot of drying time, but I think I can meet my deadline.
It’s at this stage I get into a muddle. I carve three blocks making sure to leave a whole corner on each to aid the exact registration of the different blocks. I start to register and hand-print the first colour and leave to dry. When I come to print the second colour a few days later, I realise that although I have left a whole corner on each plate for registration, they are different corners. The abstract nature of the image has confused me. I’m annoyed with myself, but I mark each plate with a large T for ‘top’ and start again.
One of the plates cracks along an edge. I work round it.
The registration is now fine, but the layering of the colours isn’t working well. I’m using water-based inks on 220gsm paper, and for some reason the red and blue inks are repelling each other. I mix the inks with some transparent medium and start again. Better, but not quite right.
I’m burnishing each plate by hand. The process is too long and too complicated. I miss the exhibition deadline. I am tired and a bit disheartened. I decide to stop and leave this one for a while.
7) Some weeks pass. But the strength of the key block and the image has stayed in my mind. I get the unsuccessful prints off the rack and have another look at them. Nothing to salvage here, so I get rid of them.
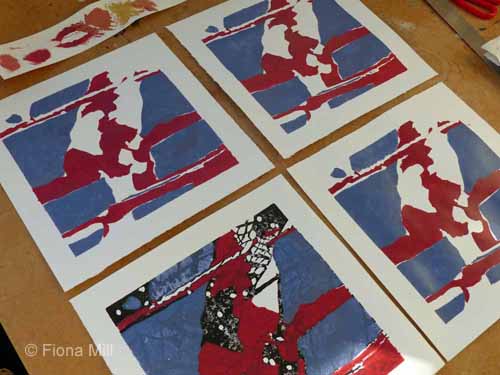
I decide to change strategy. I print the colours using masks and stencils cut from the key block. I print some key blocks and leave to dry, then cut a stencil for each colour. No need to flip the stencils. I make my own inks from a 50:50 combination of acrylic based paint and screenprinting fluid. Drying time is fast so I work quickly. The ink works well, and the colours are true. The shapes look good but I won’t know if it’s successful until I overprint the black key-block.
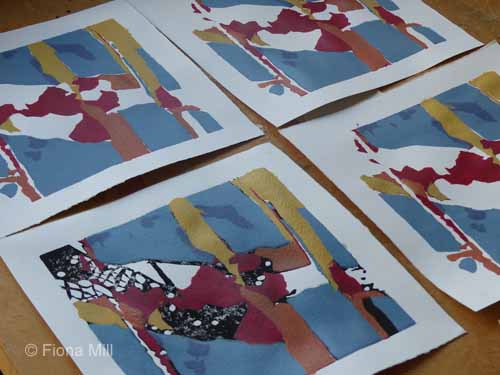
8) I end up experimenting with various types of printing inks in black. There is a slight sheen to the 50/50 home-made ink, probably an acrylic content, so water-based printing ink is repelled. I try washable oil-based ink, but it dries too matt and is not quite right. I’m beginning to run out of coloured screenprints for experimentation.
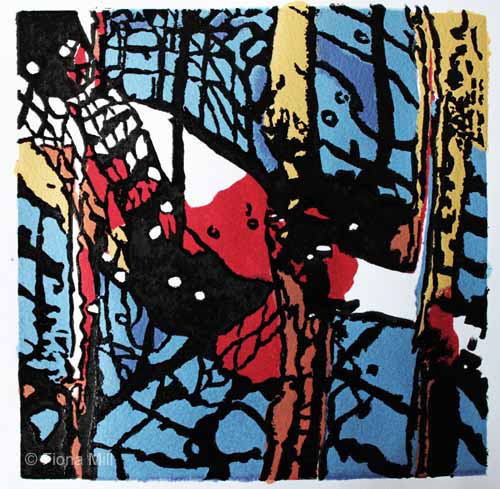
I decide to use rubber-based printing ink for the black key block. Success. The key-block brings the image together. The line and composition is strong. I am pleased with the image. not so pleased with the cleaning up… rubber-based ink is sticky.
The whole process from start to finish has taken about 6 months. The muddles I got into are not atypical. Printmaking can be a frustrating and unpredictable process. But the idea of the final image stayed with me, and I persisted until I had resolved it. Whether I will print an edition or not… well, I’m not sure at the moment. But I expect I will (after a suitable amount of time has elapsed!)